Master Blocks
Master Blocks PRO Installation
Master Blocks Pro enhances the capabilities of the free version by providing advanced features and functionalities. To enjoy the benefits of Master Blocks Pro, you need to install and activate it on your WordPress Dashboard.
This guide will walk you through the simple steps to activate Master Blocks Pro and seamlessly replace the free version.
Prerequisites:
- Make sure to Download Master Blocks Pro from your Account Page
Note: You Don't need to keep both the free and pro versions active simultaneously. Activating Master Blocks Pro will automatically deactivate the free version.
Step 1: Purchase Master Blocks Pro
- Visit Master Blocks Pricing
- Choose the pricing plan that suits your needs and click "Purchase Now."
- Follow the on-screen instructions to complete your purchase.
Step 2: Download Master Blocks Pro
- After successfully purchasing Master Blocks Pro, you will receive an
email confirmation with a download link. - Click the download link to obtain the
Master Blocks Pro plugin ZIPfile to your local computer.
Step 3: Install Master Blocks Pro
Log in to your WordPress Dashboard.
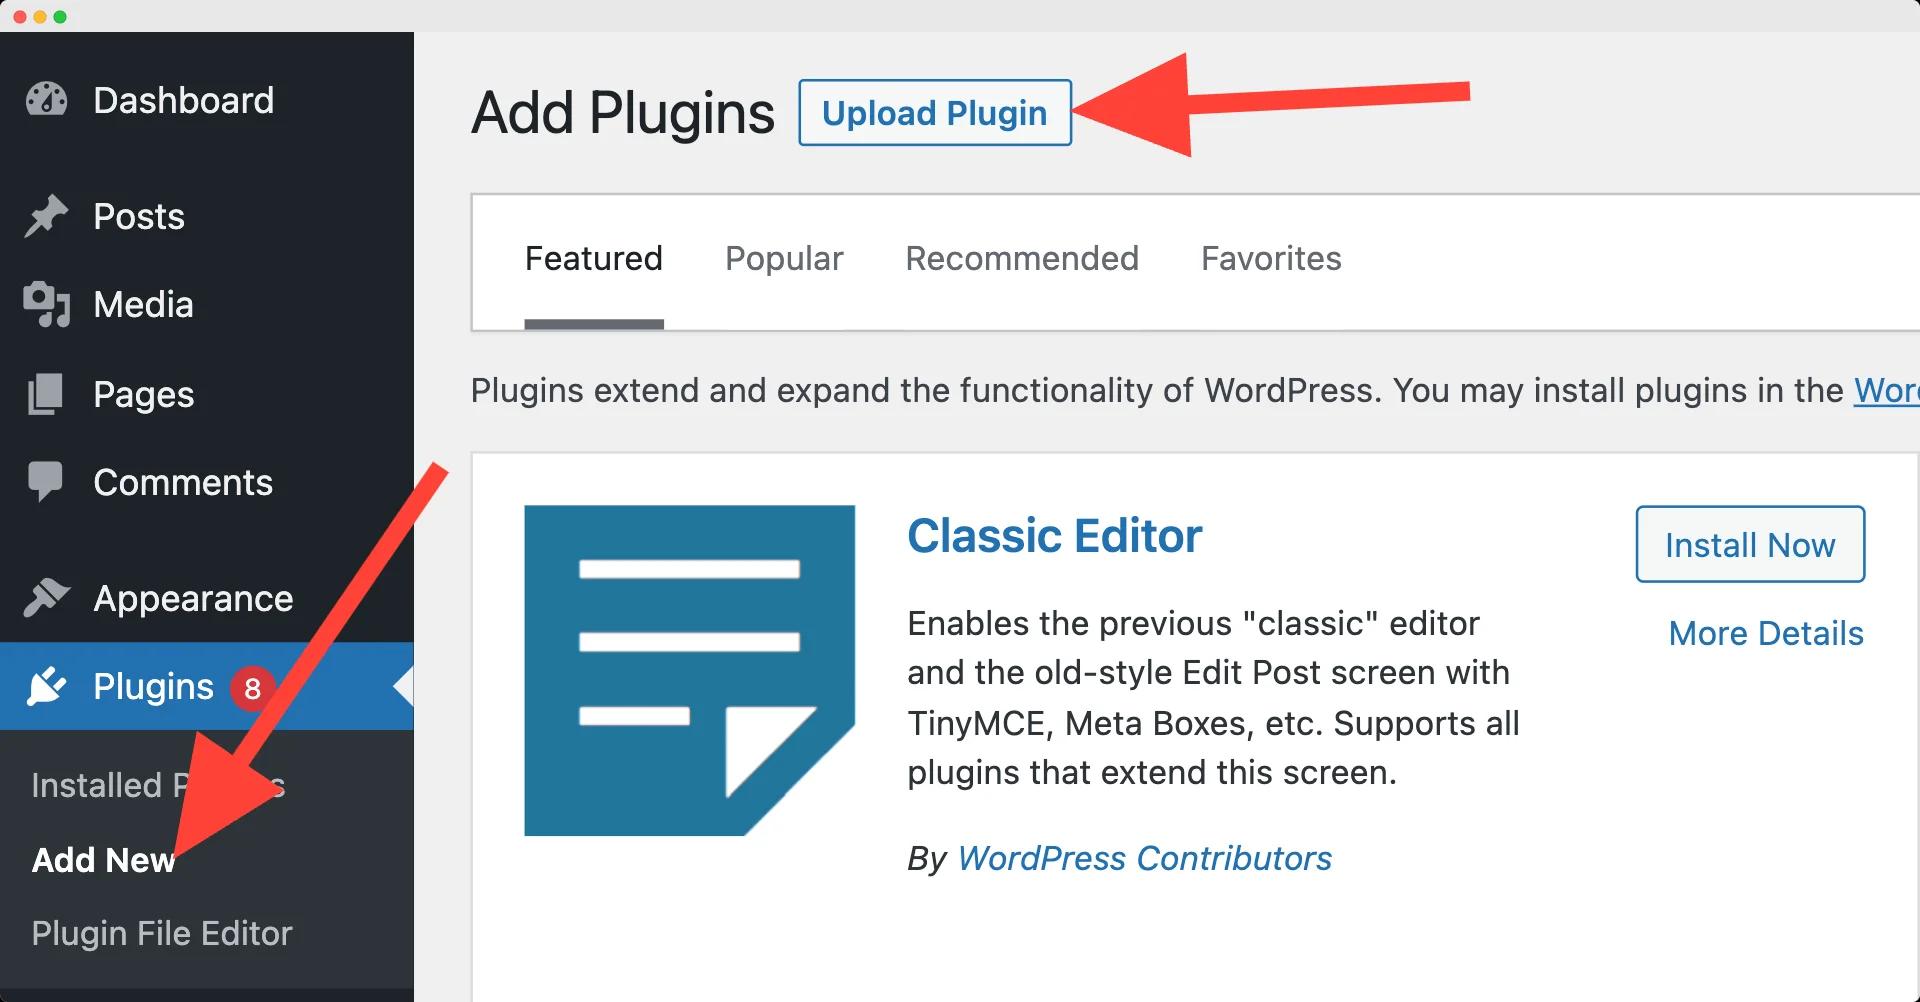
Navigate to "Plugins" in the left-hand sidebar and click "Add New."
On the "Add Plugins" page, click the "Upload Plugin" button located at the top of the screen.
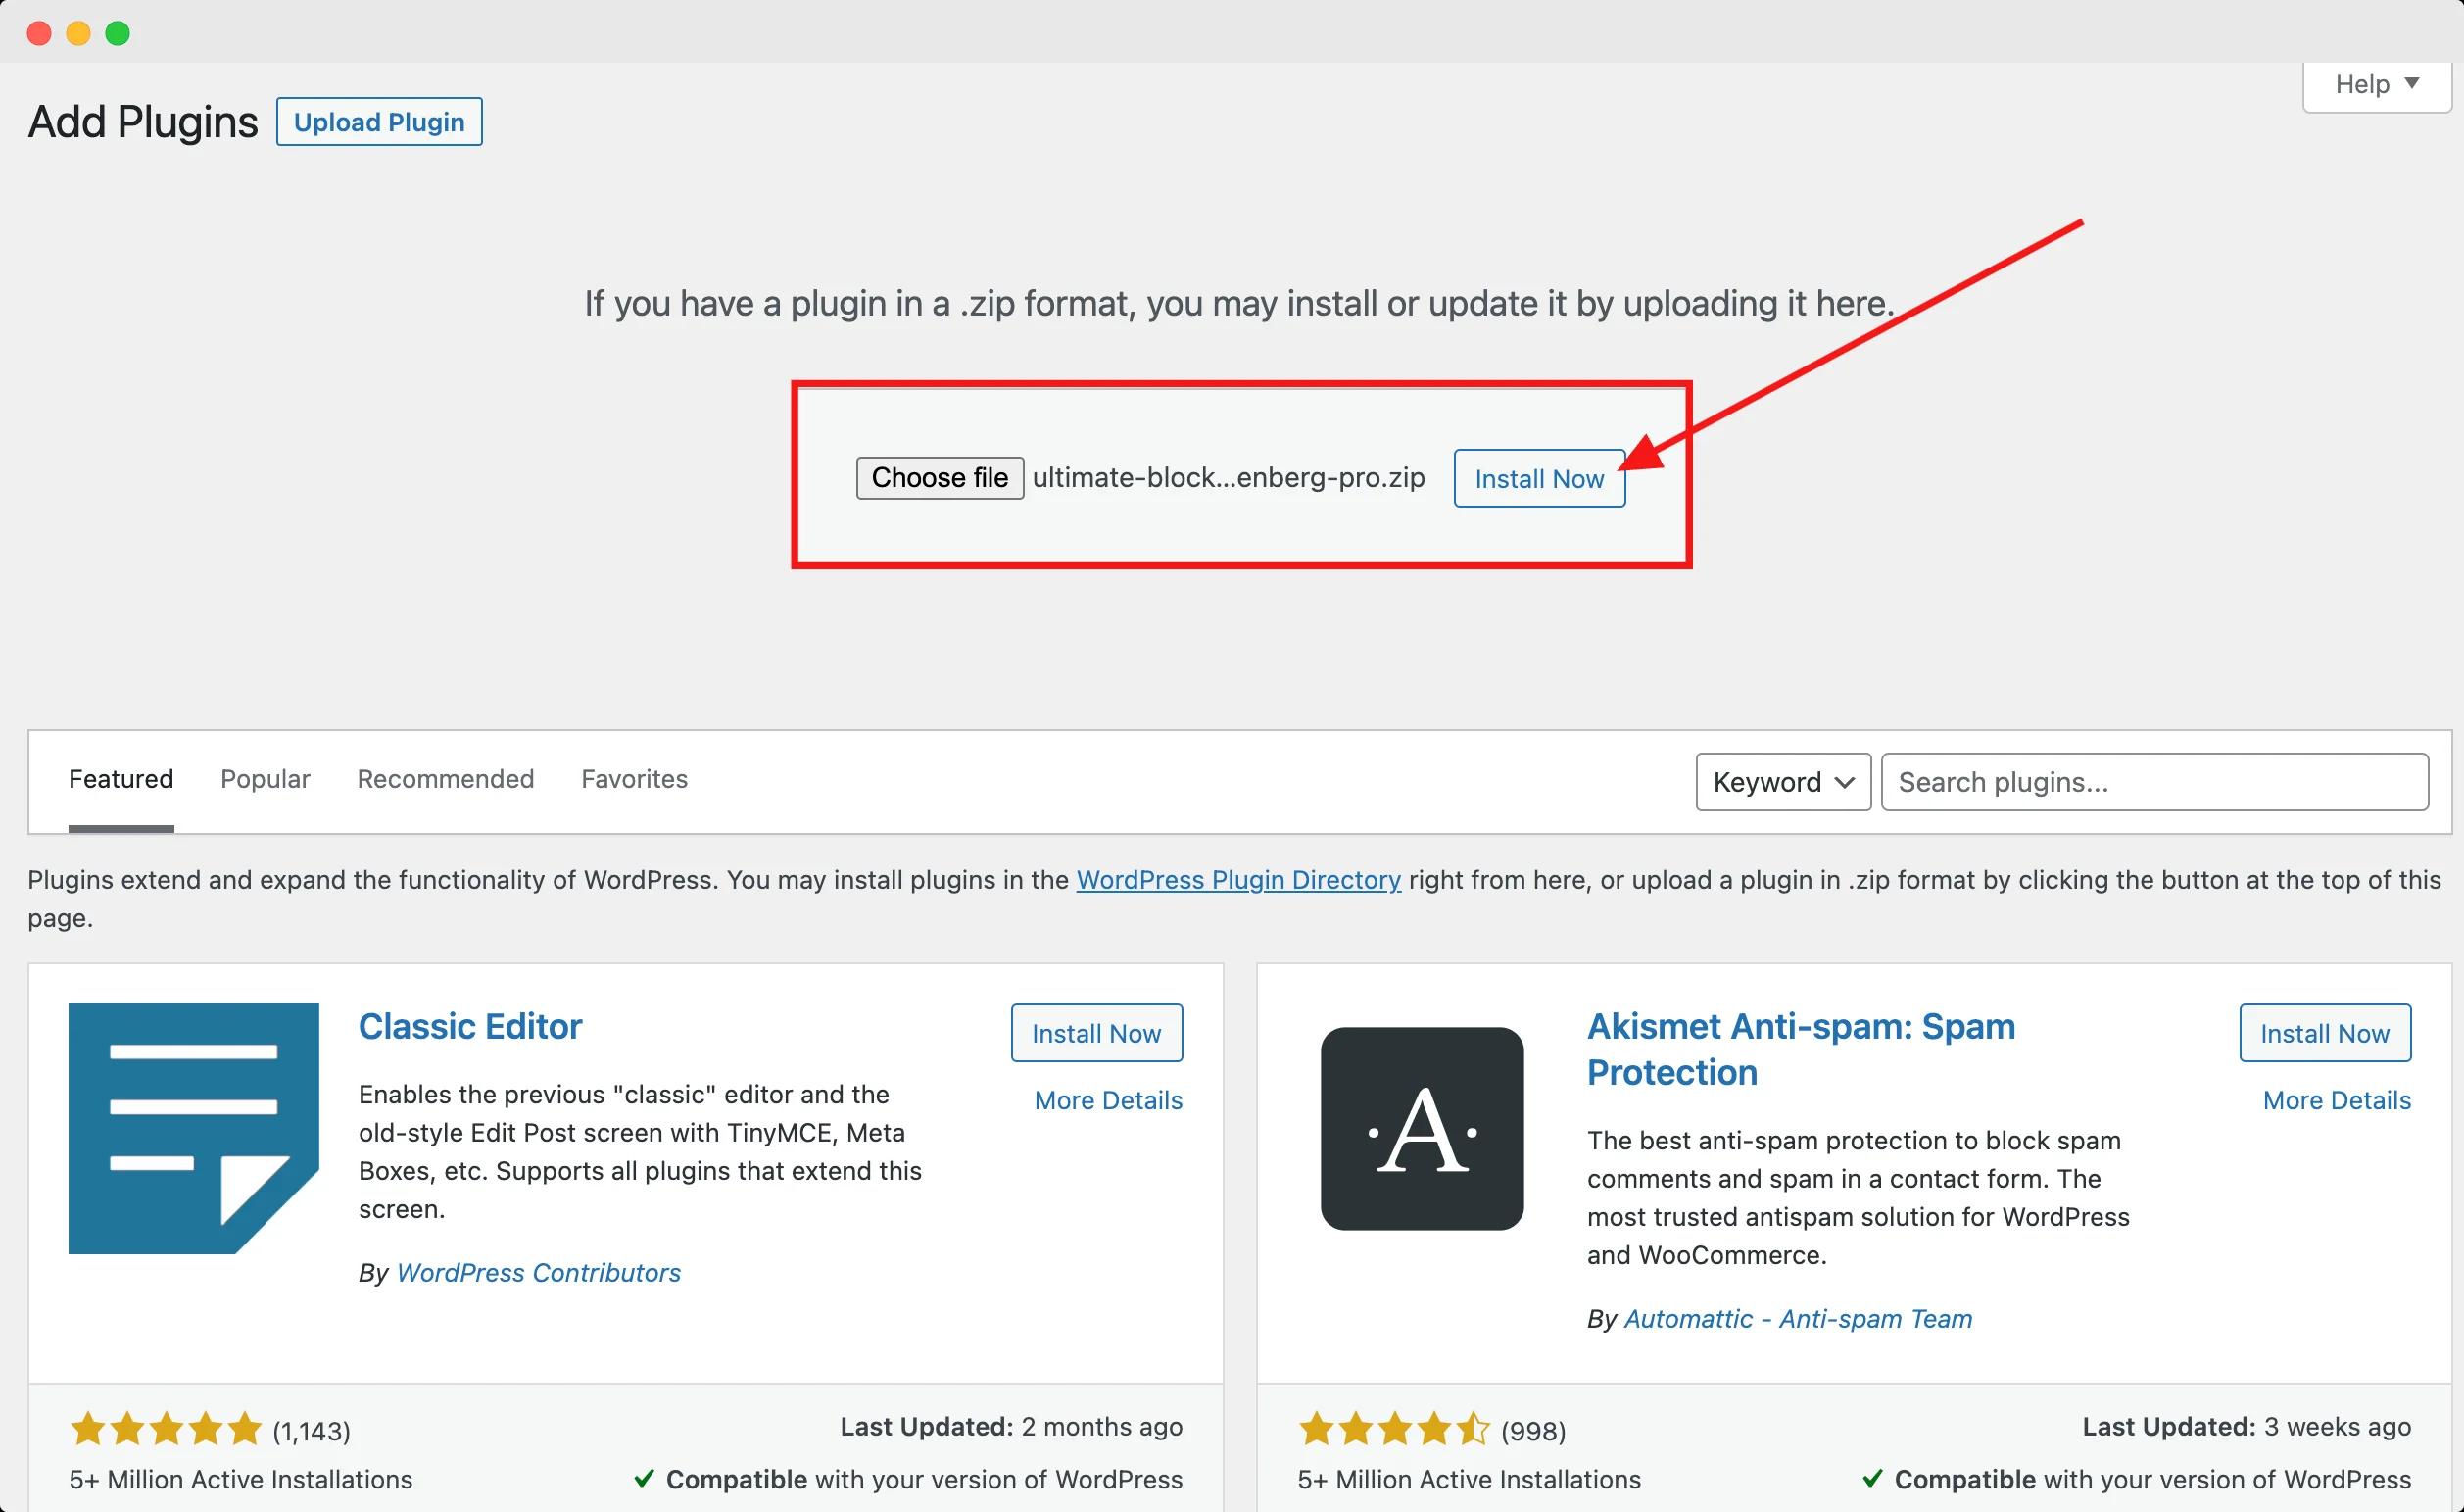
Click the "Choose File" button, select the Master Blocks Pro ZIP file that you downloaded earlier, and click "Install Now."
Wait for the installation process to complete. Once finished, you will see a success message.
Step 4: Activate Master Blocks Pro
After successfully installing Master Blocks Pro, click the "Activate Plugin" button.
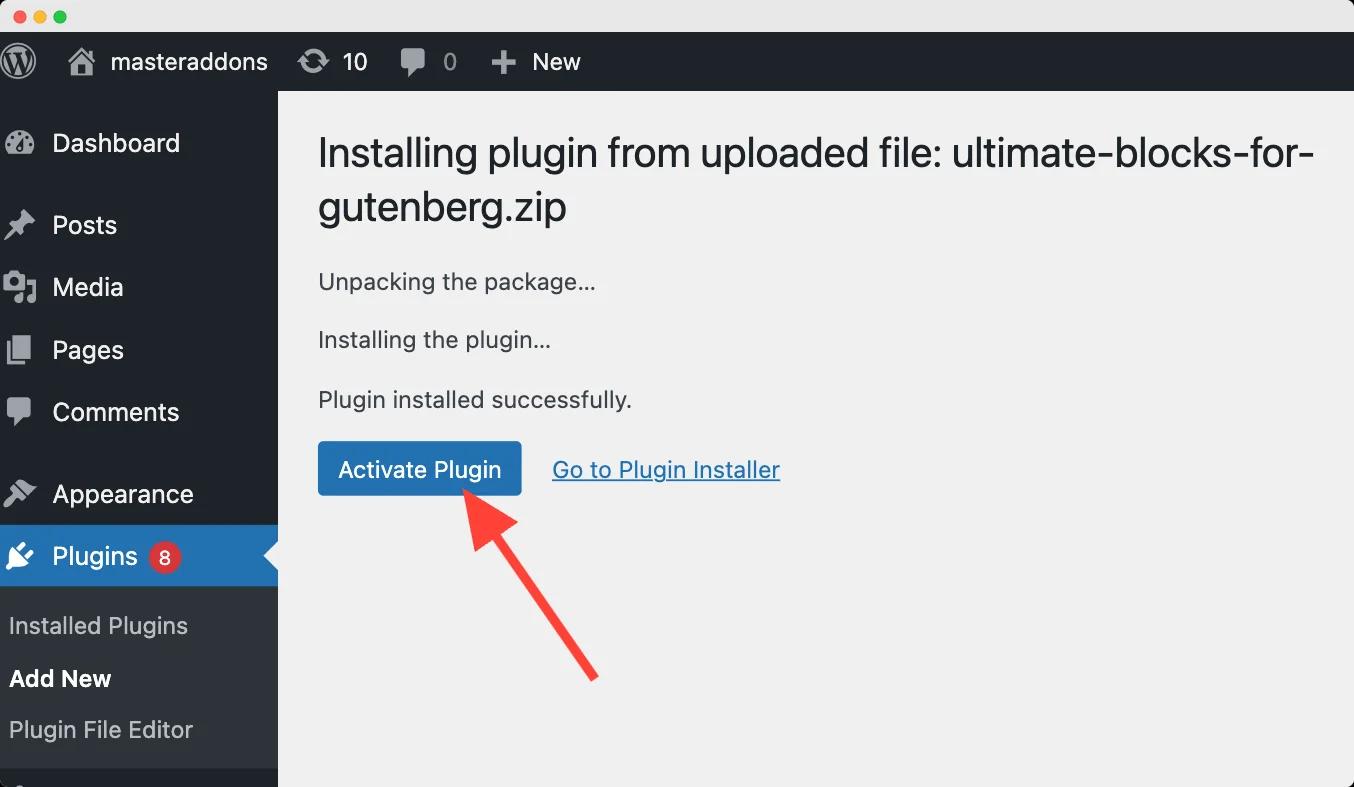
The free version of Master Blocks will automatically deactivate, and the Pro version will become active.
Step 5: Verify Activation
To ensure that Master Blocks Pro is successfully activated, navigate to "Plugins" in the left-hand sidebar and check if "Master Blocks Pro" is listed and marked as "Active."
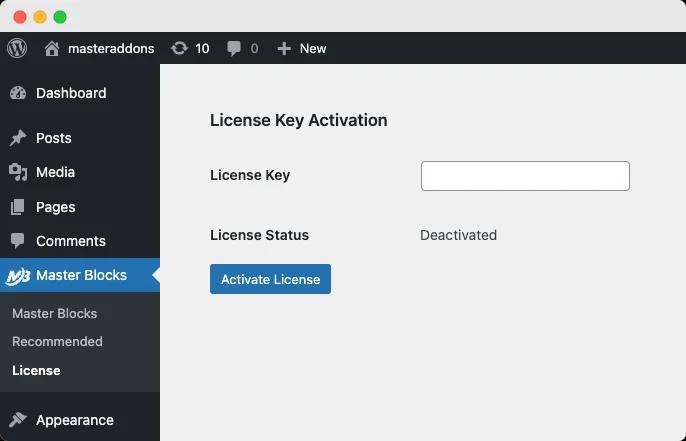
Step 6: License Activation
Now, you need to active the License that you have purchased to get the pro features. Only Pro plugin activation is not enough to unlock the pro feature.
Just hover on "Master Blocks" then click on "License" option as marked on the following screenshot.

Now just copy and paste the Master Block license key (You can always check your license key inside your Account page).
Step 7: Remove the Free Version (Optional)
- If you wish to free up space and avoid any conflicts, you can choose to remove the free version of Master Blocks.
- Navigate to "Plugins" in the left-hand sidebar.
- Locate "Master Blocks" (the free version) and click "Delete."
Conclusion:
You have successfully installed and activated Master Blocks Pro on your WordPress Dashboard. Now you can enjoy all the premium features and enhancements that it offers.
If you encounter any issues during the installation or activation process, please reach out to our support team for assistance.
Didn’t find what you were looking for? Get in touch!
Updated on October 4, 2023
Was this helpful to you?