
Securing your local development environment is crucial! If you're using the LocalWP app to manage your local WordPress sites, this post will show you how to enable HTTPS on localhost using LocalWP app and configure SSL to ensure your local traffic is encrypted like on a live server.
Let's dive into the simple tips that transform your local sites into secure, SSL-enabled havens.
Why is SSL necessary in Local sites?
You might be wondering if you need to secure your local website with an SSL certificate. The answer, in most cases, is no.
SSL certificates encrypt communication between a website and a user's browser, protecting sensitive information like passwords or credit card details. Since local sites operate entirely on your machine and don't transmit data externally, there's no inherent risk of data breaches without SSL.
If SSL is not enabled, then WordPress Login may not work for mixed content. Also, Customize Login Screen and Change Login Redirect will also not work as expected.
However, there are a few reasons why you might consider using SSL for local development:
- Testing Security Features: If your website will use SSL in its final, public form, you can set up a local development environment with SSL to test features like secure login forms or payment gateways.
- Simulating a Production Environment: Using SSL locally can mimic the behavior and security protocols of your website's eventual deployment, helping you identify any potential issues before launch.
One important thing to remember:
Using SSL locally doesn't replace the need for a proper SSL certificate from a trusted authority for your website's public deployment.
Overall, SSL certificates are not crucial for basic local website functionality. However, they can be a valuable tool for specific development scenarios and testing security features before your website goes live.
Enable HTTPS On Localhost
Start Your Site: Open your LocalWP application and click on the 'Start Site' option for the local site you wish to secure with SSL.
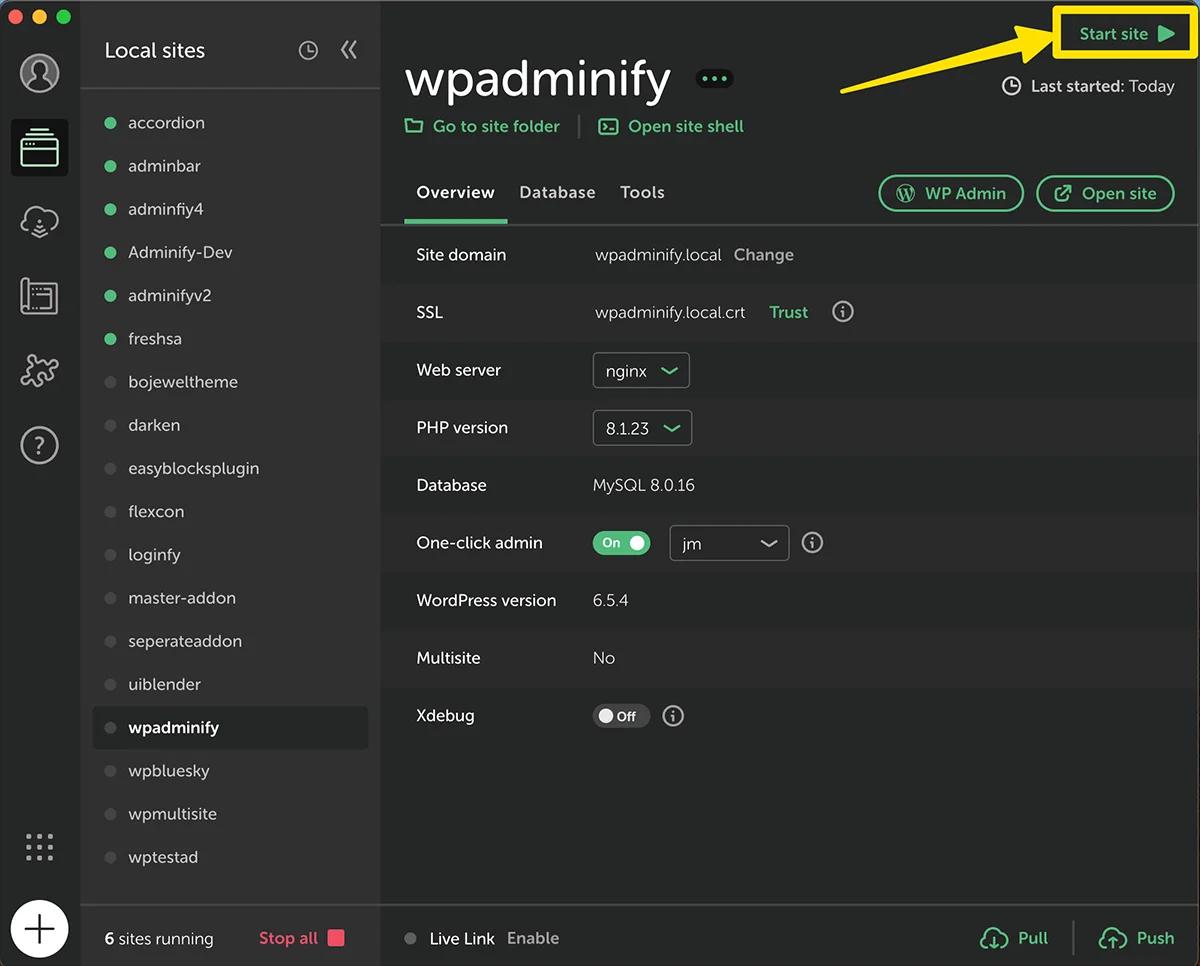
Trust the SSL Certificate: Look for the SSL option under your site domain. Next to it, you'll find the 'Trust' button.
Click on it, and you'll be prompted to enter your system's fingerprint or password. You may notice a heads-up error in your localWP app, but don't worry about this error.

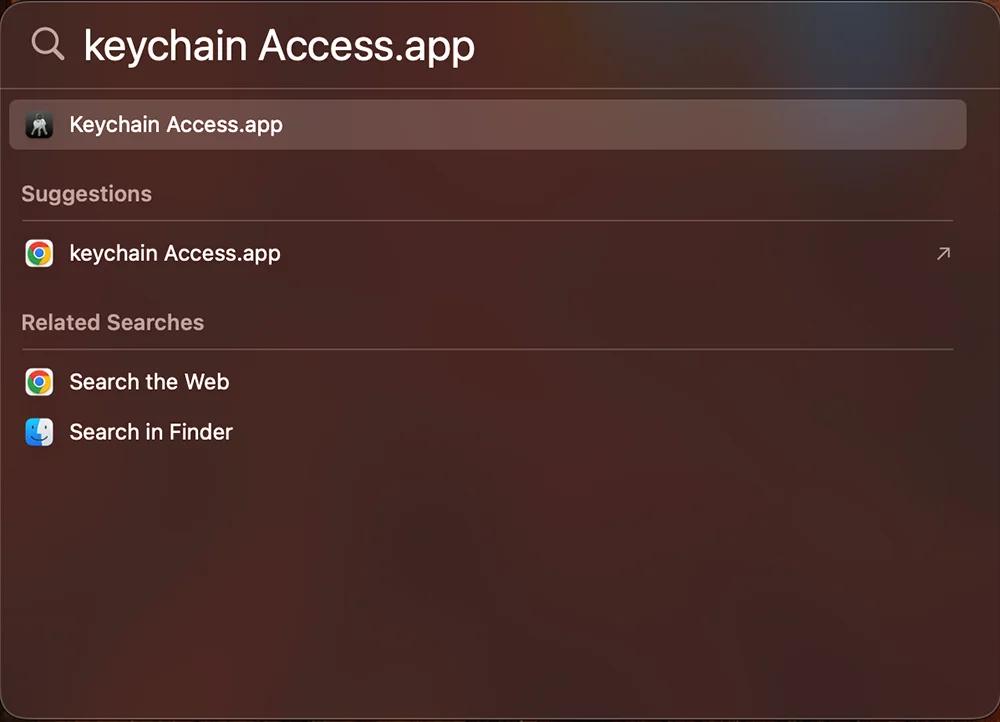
Access Keychain: Press cmd+Space to open the Spotlight search and type in 'Keychain Access.app' to find and open the application.
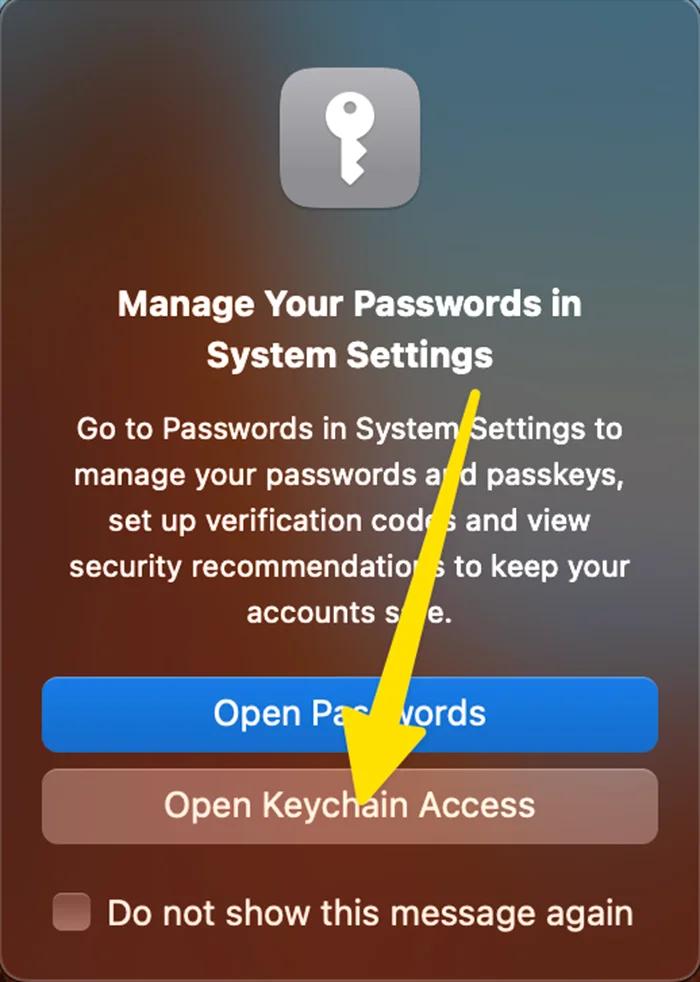
Open Keychain Access: In the Keychain app, you'll see two options: 'Passwords' and 'Keychain Access'. Click on the 'Open Keychain Access'.
Search for Your local Domain: Within the Keychain Access manager, use the search function to locate your local domain name.

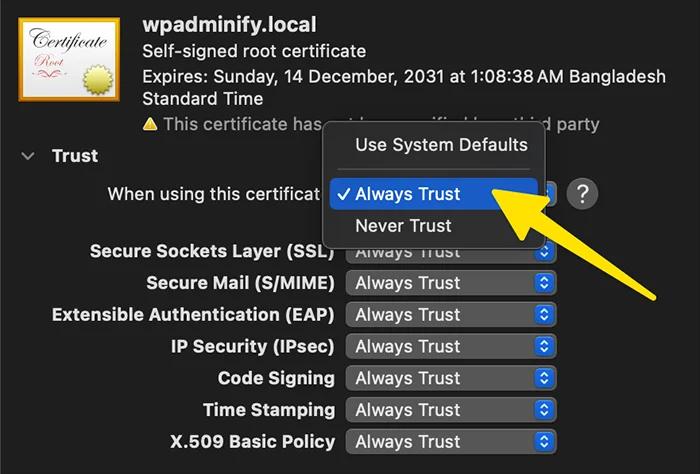
Expand Certificate Trust Settings: Once you find your local domain in the search results, double-click on it. A popup will appear, showing a 'Trust' section. Expand this section to view more options.
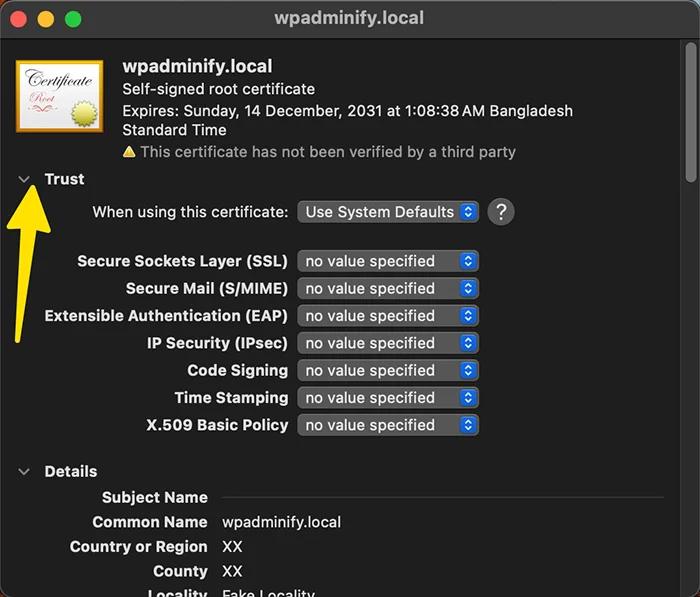
Set Certificate to Always Trust: Select 'Always Trust' in the dropdown for 'When using this certificate'. You'll be asked to confirm your choice by entering your fingerprint or password once more.
Navigate to WordPress General Settings: Navigate to your WordPress Dashboard, then go to Settings > General.

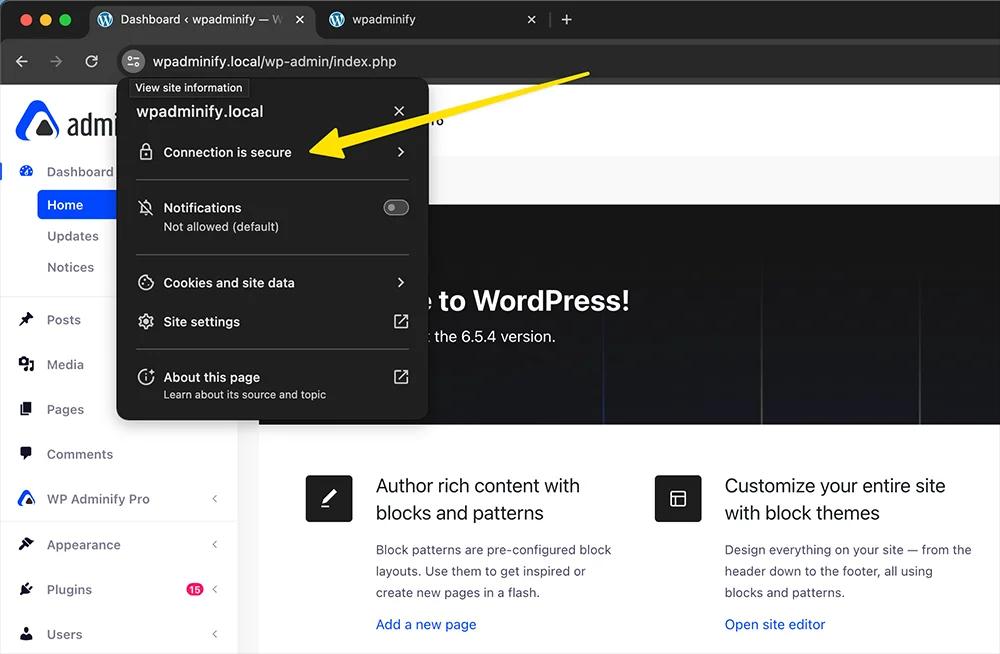
Change Site URLs: Here, update the WordPress Address (URL) and Site Address (URL) fields to the HTTPS version of your local domain. Save the changes. You'll be logged out and will need to log back in with your username and password.

And that's it! Now you know how to enable HTTPS on localhost using Local WP app. While this process adds an extra layer of security to your local development, it's important to note that enabling SSL may disable the one-click admin feature in LocalWP.
Despite this minor inconvenience, the added security is worth the effort, ensuring that your local development practices align with the best security standards.
Final Thoughts
Enabling HTTPS on localhost using the LocalWP app is a straightforward and crucial step for web developers looking to create secure WordPress sites in a local environment.
By following the steps outlined in this guide, you can easily configure SSL certificates and ensure your development site mirrors the security standards of a live site. This not only protects sensitive data during development but also helps you troubleshoot and resolve any potential HTTPS-related issues before deploying your site to production.
Adopting HTTPS from the start ensures that your website is secure, builds trust with users, and aligns with modern web security best practices. By leveraging the capabilities of LocalWP, you can focus on building great websites and confidently transition from local development to a live, secure WordPress site.


Your email address will not be published