The Admin Bar is one of the handiest tools on WordPress as it can immensely help you achieve faster workflows and more customized user-intuitive admin bars that contribute to better working conditions.
However, this same level of handiness can hold it back sometimes. If you’ve used WordPress in any capacity you’ll know that whenever you install a new plugin on your dashboard it often adds itself to the admin bar as an option.
Install enough plugins and you’ll literally not know where one option ends and another starts.
The admin bar can become cluttered, overwhelming, and full of distractions leaving you pulling out your own hair.
But with a few tweaks, you can turn your admin bar into a beast as well as save your hair. Here are 5 ways to make your toolbar cleaner, more efficient, and truly user-friendly. Best of all, you can do most of these customization with a tool like the Admin Bar Editor. Let’s dive in.
1. Remove Unnecessary Menu Items
As we’ve already mentioned there’s no need for an admin bar that stretches across your screen from one end to another just because every plugin you install wants its own menu on the bar.
Start by decluttering—hide links that don’t serve your workflow, and move entire plugin menus into one dedicated menu for plugins.
How to Do It:
- Open Admin Bar Editor > Backend.
- In the list of menu items just turn off the ones you don’t want to see.
Example:
Remove links to Comments or Updates if you rarely use them. Just turn the option off and save settings.
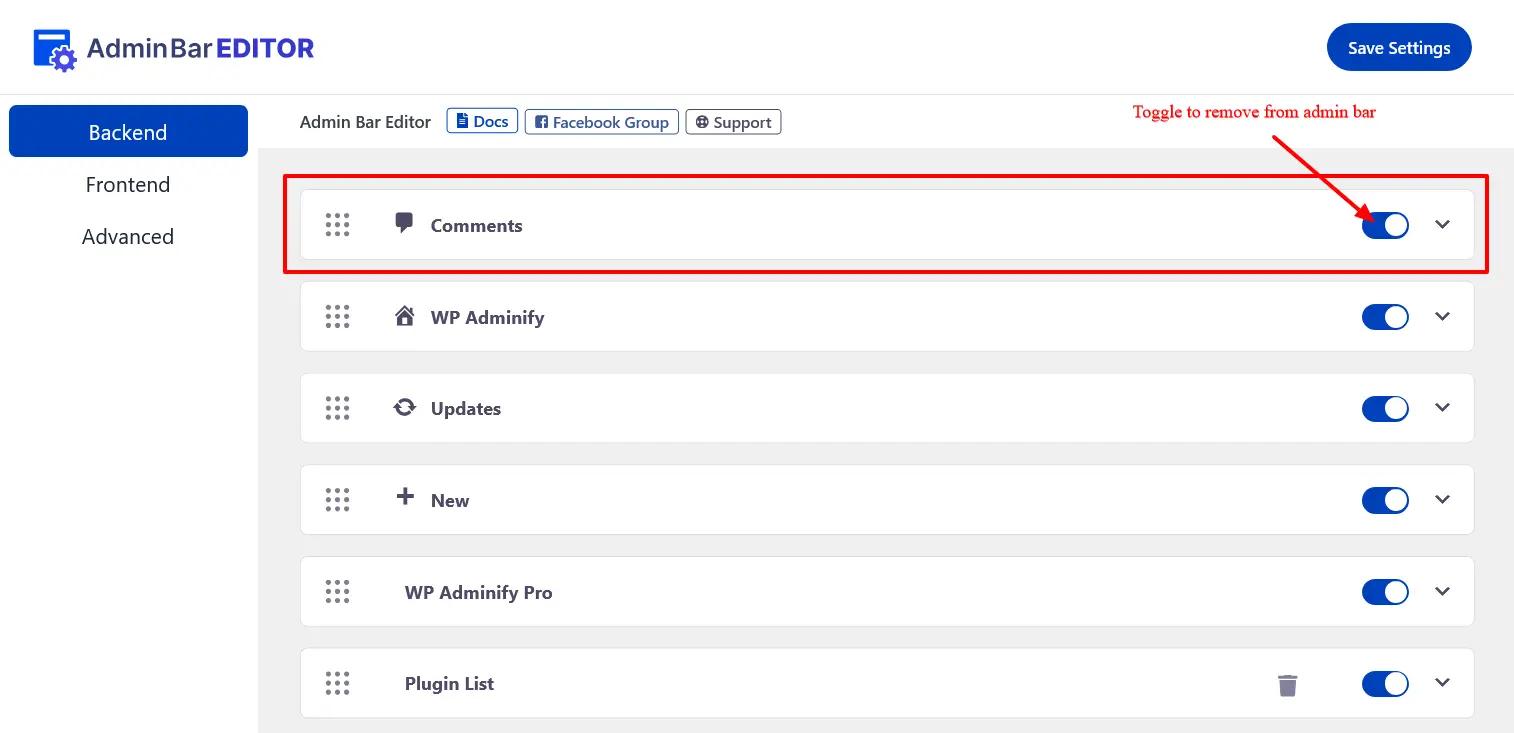
The comments option will be completely removed from the admin bar.

You can even hide plugin-specific menus that clutter your bar as we’ve already discussed.

You can just toggle them off.
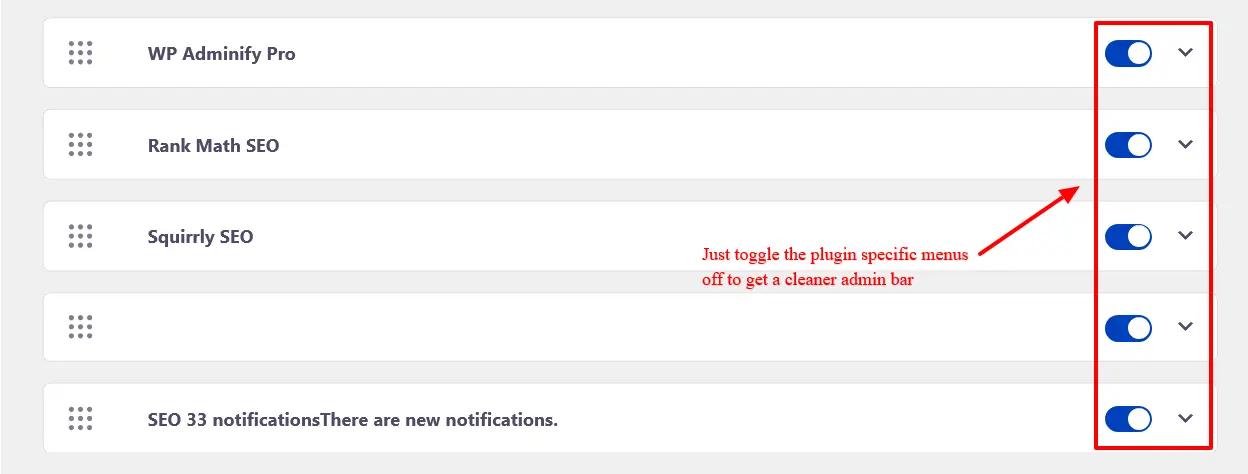
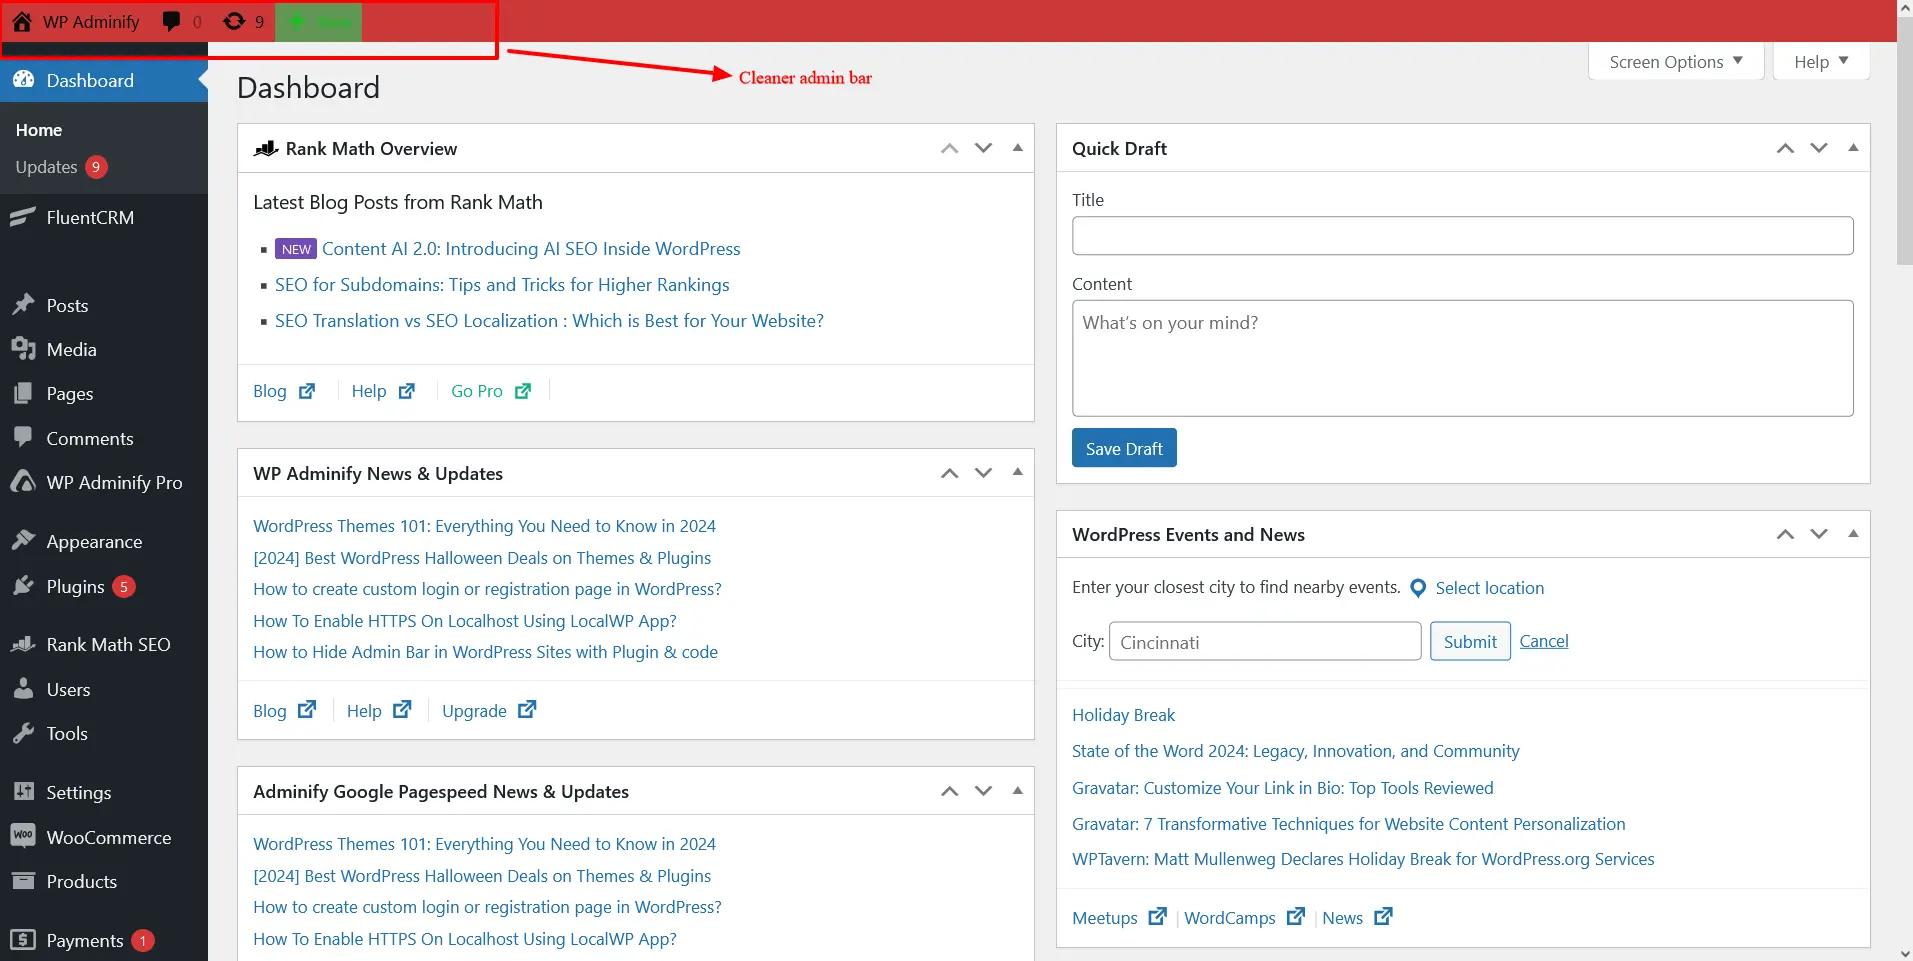
Giving you a cleaner admin bar.
2. Add Shortcuts to Your Most-Used Pages
Think of the Admin Toolbar as your personal command center.
Adding shortcuts to frequently visited tools or pages can save you several clicks.
How to Do It with Admin Bar Editor:
- Go to Admin Bar Editor > Add New Item.
- Set the title (e.g., "SEO Settings" or "Media Libary").
- Paste the URL link for the page or tool you want to access.
- Optionally, assign a custom icon to make it visually intuitive.
- Click Save, and your shortcut is live!
Example:
Just go to the Admin Bar Editor, and add a new item to the bar by clicking on “Add item”. For example, to put the media library on the admin bar just add a new item and name it “Media Library” and link to your Media library.

You can further choose to select custom icons for this menu item from our icon library or even upload your own menu item.
Here’s what the “Media library” option will look like on the admin bar.

3. Organize Menu Items into Submenus
Grouping related items into submenus is a great way to keep your toolbar tidy without losing functionality.
How to Create Submenus:
- In Admin Bar Editor, add a Parent Menu (e.g., "Tools").
- Under the parent menu, add child items (e.g., "SEO Settings," "Analytics").
- Save your changes.
Example:
You can choose to create a new plugin menu that can contain the plugin menu links. You can even create sub-menus for specific submenu options that you want on the admin bar. For example, you can create plugin specific menus such as for Yoast and other plugins that come with their own admin bar menus when installed.
Just click on the add item button, name the item something like “Plugin list” and link specific plugin menus to the sub menus.

Here’s what it’ll look like:

For PRO users:
You can even create 2nd-level submenus for better organization.
For example, for WooCommerce, you can add Orders, Customers, and Coupons options by adding items to the submenus, naming them accordingly, and linking them.

This is what it’ll look like:

If you’re a pro user you can add as many customized options to these menus and sub-menus. Just name them and link them in the Admin Bar Editor and you’re done!
This Admin Bar Editor simply gives you as much customization power as you need when it comes to your admin bar.
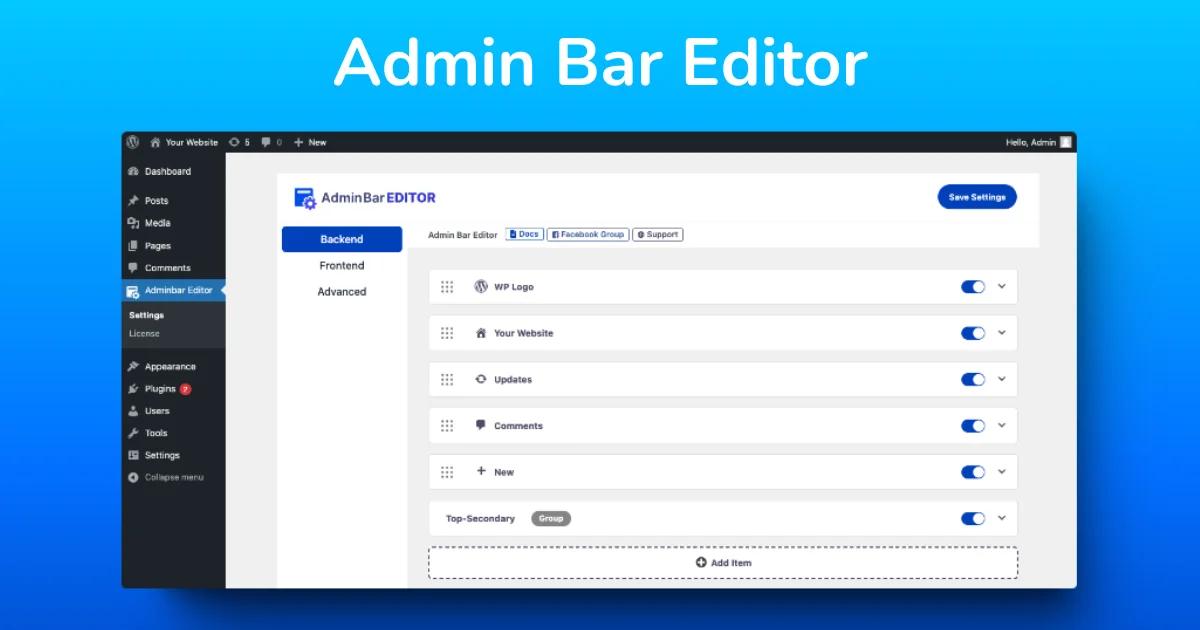
Get a Fully Customized and Optimized Admin Bar!
Remove, reorder and design freely with Admin Bar Editor.
4. Customize Toolbar Visibility for Different User Roles
Not every user on your site needs the same toolbar. By tailoring the toolbar to specific roles, you can make it more relevant and less overwhelming.
How to Set Role-Based Visibility:
- Open Admin Bar Editor > Menu Item Settings.
- Select the menu item and apply visibility rules (e.g., “Show only for Admins”).
- Save your settings.
Example:
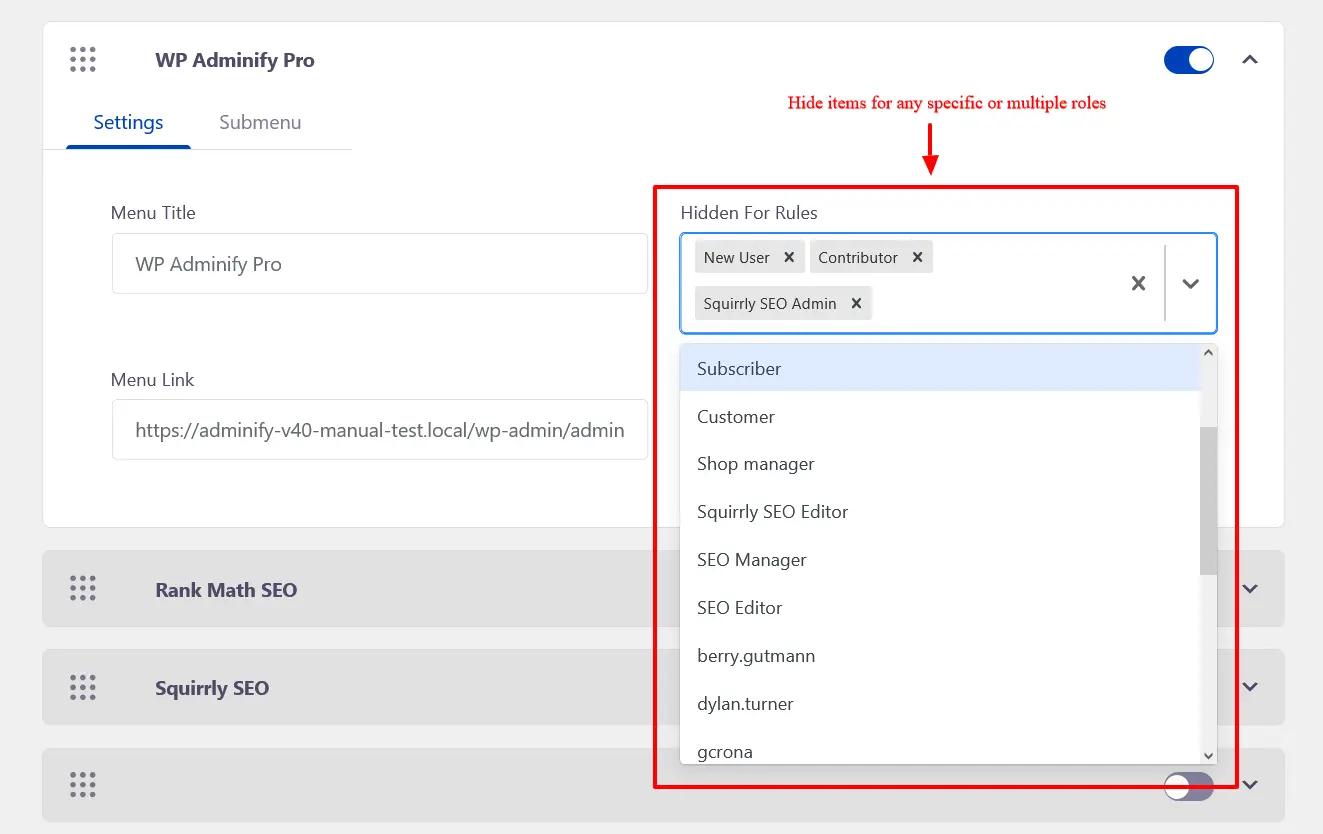
Here, you can choose who can see the WP Adminify Pro option on the admin bar. You can select one user or multiple users in the "Hidden for rules". These user types will not see the WP Adminify Pro option on the admin bar.
5. Redesign the Toolbar for Simplicity
Functionality is important, but a customized and personally branded admin bar matters too.
A visually clean toolbar is easier to navigate and faster to work with.
How to Style the Toolbar (PRO Features):
- Navigate to Styles in Admin Bar Editor.
- Customize:
Background Color for the toolbar.
Text Color for better readability.
Dropdown Styles for cleaner menus.
Button Highlights for easier access to key tools like "New." - Save your changes.
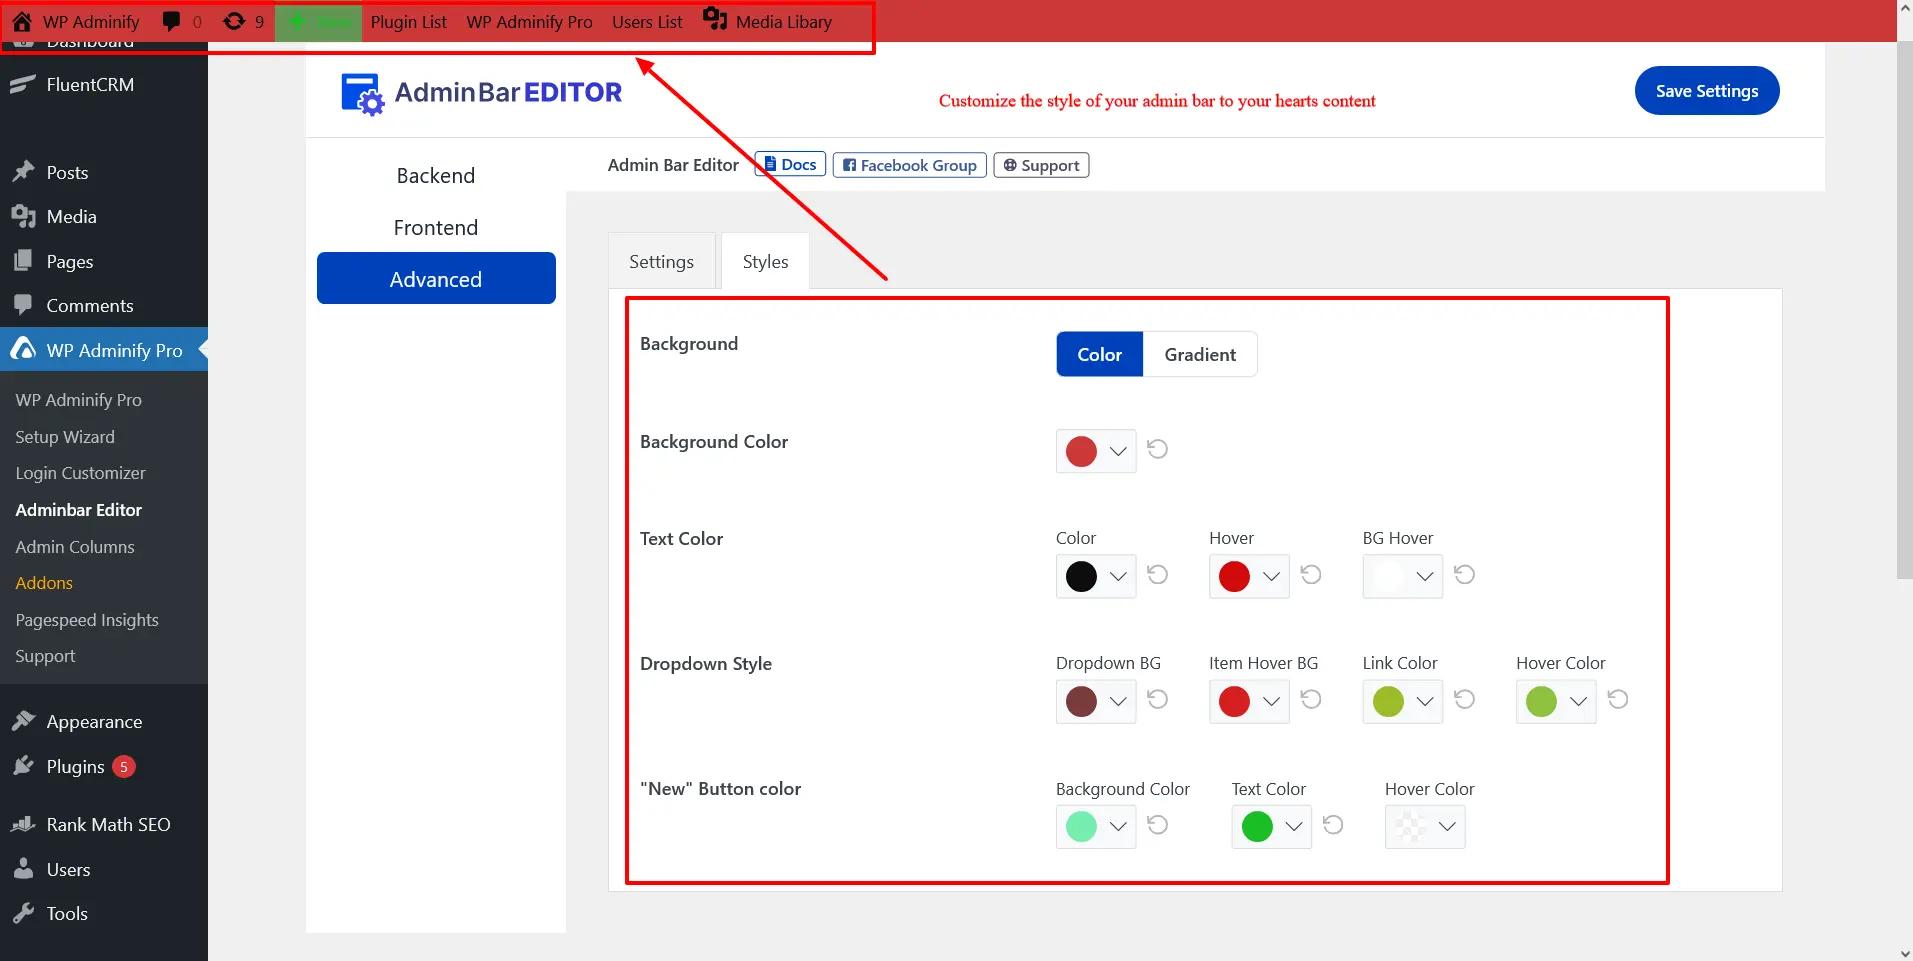
As you can see in the image below we've extensively decked the admin bar in red green and yellow in the spirit of the Christmas holidays!
Wrapping It Up
Making your WordPress Admin Toolbar more user-friendly doesn’t have to be complicated. Whether you’re simplifying it by hiding unused items or creating shortcuts to save time, these small changes can significantly improve your workflow.
And with tools like WP Adminify’s Admin Bar Editor, these tweaks become effortless. From decluttering to styling, the possibilities are endless.
Ready to create a toolbar that works for you? Start with these tips and take control of your WordPress experience.


Leave a Comment
Your email address will not be published